
The WowWee company offers an autonomous WiFi robot which seems to be the most pleasant. Responding to the sweet surname of Rovio, this robot is completely original since it can be controlled remotely through an Internet browser or even an iPhone. With a built-in microphone, a loudspeaker and an articulated arm surmounted by a webcam, the Rovio seems to be ideally intended to communicate remotely with the people present near the robot. It's also a convenient way to monitor your home
Introduction
The Rovio is above all a robot which acts as a mobile IP camera since it is possible to control the machine not only locally but also remotely via the Internet. The robot, equipped with its microphone and webcam, is capable of streaming video and sound in order to see and hear everything that is happening at home remotely through a simple Internet browser.
WooWee Rovio Robot
Equipped with 3 wheels, the Rovio is able to move in all directions of your house (without being able to go up or down stairs, it goes without saying). He is also able to navigate on his own to find his base to recharge his batteries.
But let's go without waiting for the beast
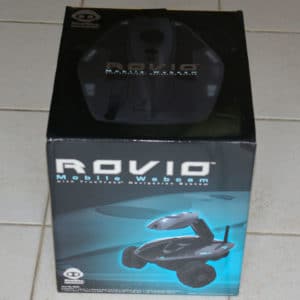
Unpacking the webcam robot
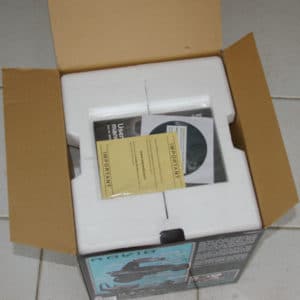
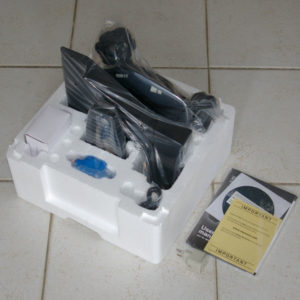
We already told you about the Rovio unpacking in our news, here we represent you the discovery of the Rovio. The box contains the following elements:
- the rovio
- its charging base
- NiMH rechargeable battery
- a manual (only in English)
- an installation CD
- a USB cable
- a transformer with power connection cable
Note that the mains plug is not compatible with our French sockets, it will then be necessary to have an adapter (English-French socket). Note that the company Expansys who loaned us the Rovio adds a French adapter in the box.
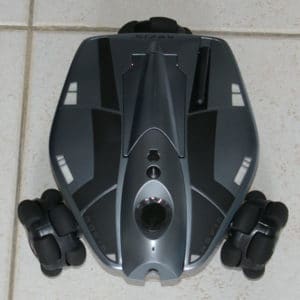
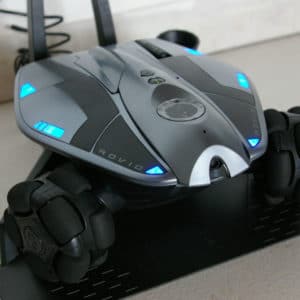
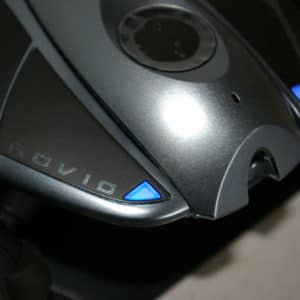
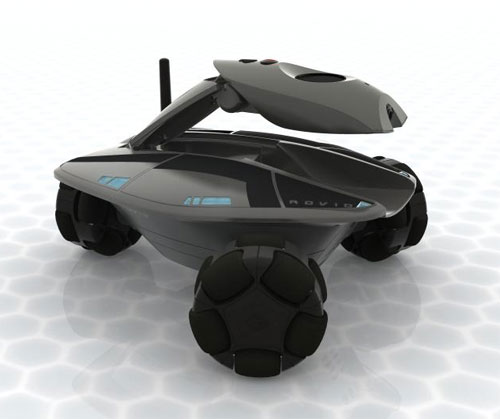
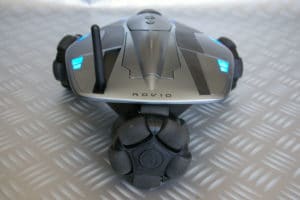
Futuristic design
The Rovio definitely has a rather successful futuristic look. Composed of plastic materials metallic appearance of gray and black colors, we can say that the craft throws a max (as the kids would say). The presence of blue diodes on both sides of the robot reinforces this successful design. Here is a series of photos to judge for yourself (click on the photos to enlarge):


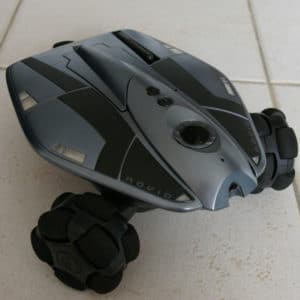
An ingenious robot
The Rovio is equipped with three rather special wheels arranged in triangles. Each of them is made up of no less than 10 small rubber wheels.
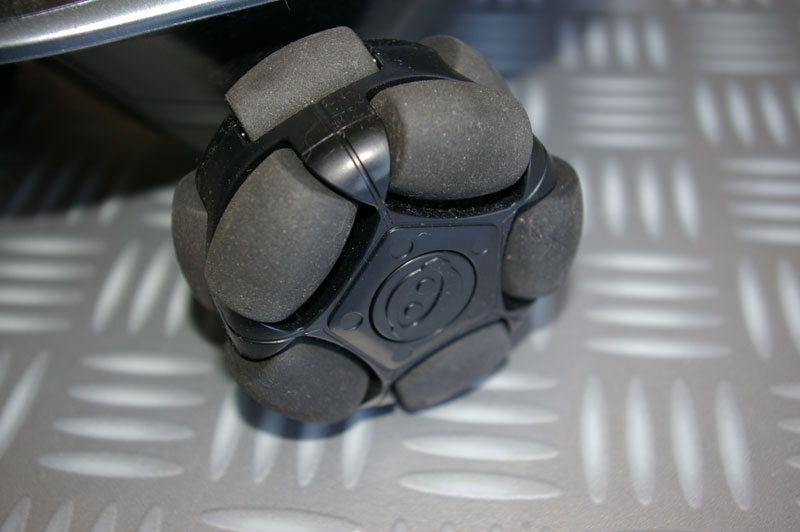
Detail of a wheel from Rovio
This ingenious system allows the robot very great freedom of movement since it can move forwards and backwards, but also sideways or obliquely. This combination allows very great flexibility of movement, as we will see later through a video.
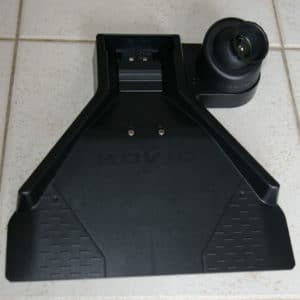
The robot also has a docking station (oudock) which will allow it to recharge. This base, connected to a mains socket, allows the machine to position itself automatically in relation to it (thanks to the NorthStar positioning system).
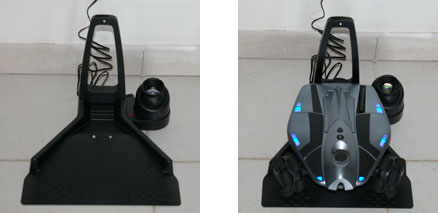
Base of the Rovio
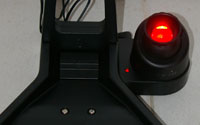
The Rovio will then be able to automatically find its way back to the base in order to recharge. For this, the docking station should be well placed on the ground, in a place clear of any possible obstacle. Then adjust the projector present on the side of the base. A red light emitting from the projector makes it possible to correctly position two light circles on the ceiling, also far from any obstacles (lamp, ceiling lamp, etc.).
Note that the red light is only present during adjustment, no visible light will be seen later.
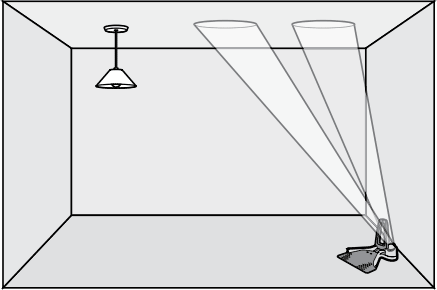
Positioning of the docking station
Installation and configuration
The installation of the software accompanying the Rovio remains very conventional.
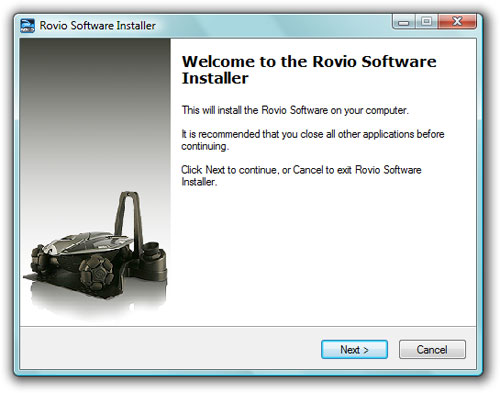
Installation of the Rovio
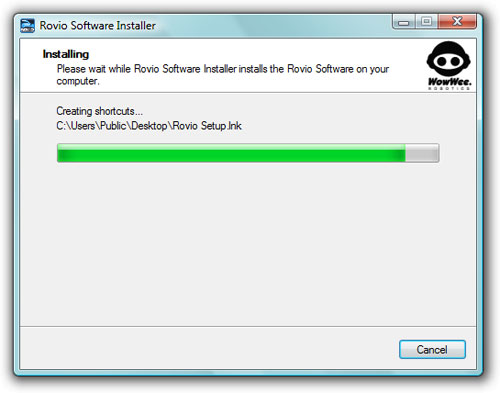
Copying files
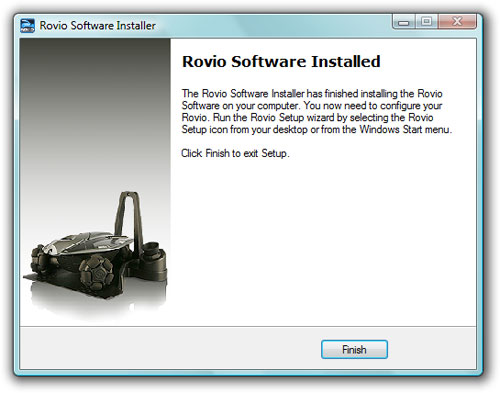
End of installation
Once the software is installed, we will be able to configure the robot so that it can connect a wifi terminal (box, router, etc.). To transmit the configuration to the Rovio, it is necessary to connect the robot to the PC using a USB cable. A mini USB socket is present on the top of the machine.
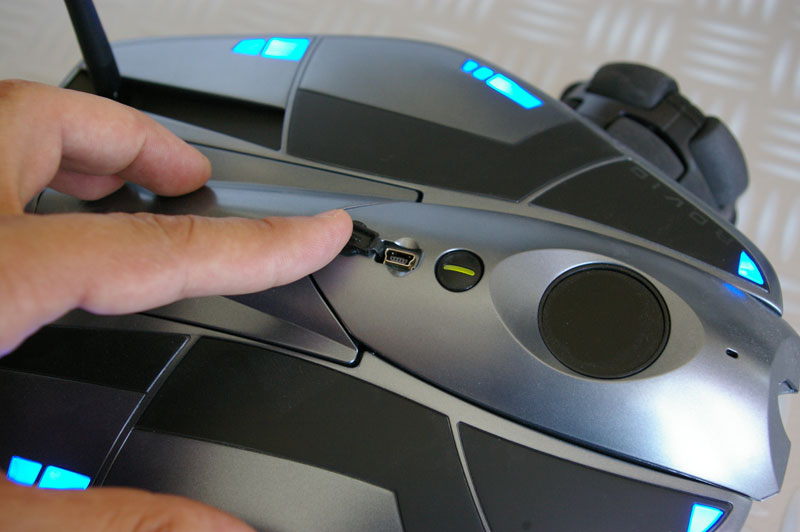
Rovio USB socket
Through the software interface, it is then necessary to indicate the classic network information allowing the robot to connect to our router (SSID, encryption key, automatic IP configuration via DHCP or manual, etc.). And the bad surprise, the Rovio only accepts WEP keys (we have done better in terms of security). But fortunately, a little tour on the manufacturer's site reassures us since the latest firmware of the Rovio allows to configure a WPA key. So we have to flash our machine and everything will be back to normal except that everything is not so simple! Indeed, to update the Rovio firmware, it must already be fully configured, including access to the router! We therefore had to modify the configuration of our router by setting up a WEP key so that we could then flash the robot. Then, after reconfiguring the router with a WPA key, we were finally able to properly configure the Rovio with the latest firmware and a WPA key. Phew! Tedious all the same! Hopefully the new robots will be delivered directly with the latest firmware version
After this step, it will then be necessary to create one or more users who can connect to the Rovio by specifying a login and password for each. The Rovio is then ready to use.
Takeover
Before taking control of the Rovio, it is necessary to know your IP. No problem if you have assigned a fixed IP when configuring the robot. Otherwise, it is the router which assigns an IP to it (via DHCP), so we can use the little Rovio Finder program:
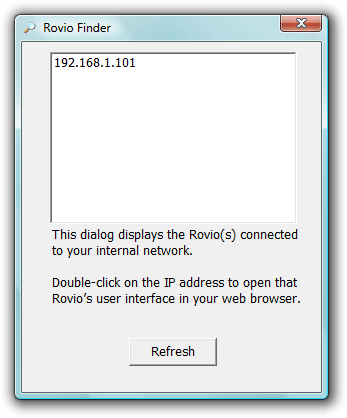
Robot IP detection
Then just enter the detected IP in a browser (or click directly on the detected IP) to take control of the Rovio. A username and password will then be requested:
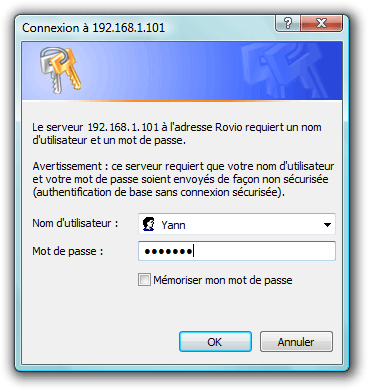
Rovio Connection
The control interface is then displayed in the browser window:
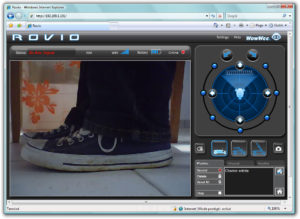
Rovio control screen
The image captured by the camera is then displayed in the control interface. We can now find the webcam.
Compatibility of browsers:
With Internet Explorer, it will be necessary to install a specific ActiveX allowing control of the Rovio.
Note that with Firefox, no need to install any plugin but on the other hand, the sound will not be streamed, only the image will be present. In order to get the sound and the picture, you have to go through a QuickTime plugin. But if the latter works very well locally, it will not work during a remote control over the Internet

Webcam view from Rovio
The web interface offers a very complete virtual joystick allowing vehicle control. And this is the real strong point of the Rovio: the simplicity of the control to perform complex movements!
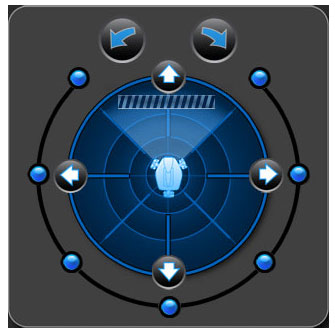
Virtual joystick to control the robot
Movement control is done entirely with the mouse. It is possible to use the direction arrows (up, down, right left) or else the two rotation arrows. For each control icon, it is possible not to release the mouse button during the click so that the movement is maintained. The small blue pellets around the circle allow when they perform rotations of 45, 90, 135 or 180. Finally, it is possible to move the Rovio in all directions by grabbing and moving the Rovio icon in the center of the radar.
Good point also, it is possible to activate in the options the detection of obstacles. This will display hatch bars on the radar where an obstacle is detected.
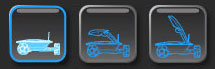
The camera can be positioned in three possible ways: low, intermediate and high. This is done with a simple click on one of the following icons:
Finally, note the presence of a button to capture an instant photo as well as another to turn on or off a small white LED in front of the Rovio. This makeshift lighthouse has the role of being able to control the robot in complete darkness. In reality, the LED is not powerful enough to actually light a scene; it will simply be able to illuminate an object a few centimeters from the lens. This flagship therefore seems to be more a gadget than anything else
Path recording
One of the very interesting features of the Rovio is the ability to record paths (orpaths). To do this, just click on Record and perform a series of actions (displacements, camera position changes, taking a photo, lighting the headlight). Once these actions have been saved under a name of your choice, it is then possible to launch this series of movements with a single click.
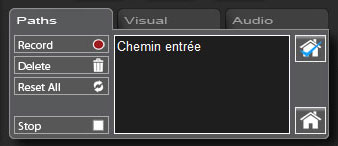
The path to the front door is saved
We can thus save positions from our home and access them quickly and automatically without having to guide the vehicle. It is ideal for being able, for example, to monitor different places in your home (between, living room, bedroom).
Another interesting feature is the ability to order the Rovio to return to its base on its own, allowing the machine to recharge its batteries. It will first be necessary to save the position of the vehicle when it is on its base. Thereafter, wherever it is, the Rovio will be able to find its way back to its base. Very useful (even essential) when the control interface indicates that the robot is unloaded and that one is not at home to place the vehicle on its owndock.
The rovio in video
After talking at length about the Rovio and its features, let's now observe its behavior through two videos
Our first video shows the different possibilities of movement of the Rovio.
This second video presents the use of the Rovio control interface.
NB: capturing the browser screen for our video causes some slowdowns present in the picture which are not visible during normal use
Control the Rovio with an iPhone
Since the Rovio can be controlled using an Internet browser, it can in theory be used from any mobile terminal connected to the network. Wherever you are, it is then possible to view each room in your home with a simple telephone.
IPhone users will have the opportunity to use a dedicated application allowing remote control of the Rovio.
Rovio Driver iPhone application
Available for free on the App Store, the appRovio Drivermakes it possible to control the vehicle using the chronometer and the touch screen. If the remote control seems a little tricky the first few minutes, it quickly becomes very pleasant and relatively precise thereafter.
The control system is simple: the entire iPhone screen displays the video captured by the webcam. You just have to move the iPhone to move the robot. Tilting your phone forward will move the vehicle forward, tilting it back will cause it to move back, etc. Double tapping on the screen will change the height of the camera. Finally, sliding your finger across the screen will rotate the robot.
Here is a video demonstrating how to control the Rovio with an iPhone.
Features
Before concluding, let us make a point on some characteristics of the Rovio which seem important to us:
- Dimensions: 27.3 x 25 x 25 cm
- NiMH 6V 3000mAh battery
- Autonomy: about 30 minutes
- 802.11b or g WiFi compatible, WEP or WPA key protection (with the latest firmware)
- 1 VGA CMOS sensor
- Infrared sensors for detecting obstacles
- Integrated speaker
- Integrated microphone
- Compatible with IE 6 or higher, Firefox 1.5 or higher, Safari 3.0 or higher, Mobile Safari, IE Mobile or Opera Mobile
Regarding the webcam sensor, we regret an average quality, especially in low light. You can view an example of a webcam capture here. Quite classic also, we will notice the presence of a slight delay between the video captured by the robot and the video displayed in the browser, but nothing serious
As with many IP cameras on the market, we will appreciate the possibility of automatically receiving by email a photo captured by the Rovio in the event of detection of a suspicious movement.
Regarding the communication door between the base and the Rovio (not to be confused with the Wi-Fi port), we regret that it is quite short (count around 6 meters). Beyond, the control of the Rovio can nevertheless operate on one or two meters but we lose precision. Likewise, the robot cannot of course detect the light signal projected on the ceiling if it is in another room. To increase the door, it is then necessary to use modules calledTrueTrack Room Beacon.

Each of its modules can be placed in a new room in order to extend the carrying of the vehicle. The use of these tags is the only solution if you want to be able to control the Rovio over long distances in different rooms.
Finally, developers will also be delighted with the existence of a documented API that will allow them to develop applications for the Rovio. Also note that the device would be hackable at the hardware level. It would then be possible to add for example an infrared projector which, unlike the current LED, would allow real navigation in complete darkness
Conclusion
We have seen over these few pages, the Rovio is a machine with attractive characteristics that offers many possibilities.
But this idyllic picture is all the same nuanced First of all we regret the average quality of the camera, although that is not very serious in itself since, to obtain a good fluidity of the video, it is necessary to lower the quality of the image . However, better quality would have been useful for taking good snapshots. We also regret the weak door of the robot, which obliges us to acquire additional modules (and by the same to increase the total bill) if we wish to monitor other parts. Likewise, there is no point in desperately using the robot for any spying mission since the Rovio in operation is noisy. Using it as a video surveillance device to surprise possible burglars therefore does not seem to be the rule of the century. And finally, the last blow is the price since you will have to pay around 380 to appropriate the beast
And yet, despite these faults, the Rovio conquered us This robot, with the appearance of a lunar vehicle, is definitely a beautiful object. It is sort of a new kind of domestic drone. Its original way of moving, its freedom of movement and its ease of control have really seduced us. Remote control via iPhone is also extremely pleasant and practical
To conclude, the Rovio is a mobile camera, certainly expensive and not free from faults, but which will delight thegeekor the lover of technology in us. It's up to you now to see if you have any real use for it
Strong points
- Freedom of movement
- Ease of control
- Possibility of remote control
- Successful futuristic design
Weak points
- Average webcam quality
- Weak door without the use of beacons
- Noisy operation
- Price
